Clockwork OrangePi - Creating A Stratum-1 NTP Server
Learn how to build a self-reliant, hyper-accurate NTP server, which we’ll lovingly call “Clockwork OrangePi,” using an OrangePi Zero LTS and GPS. This guide is perfect for those living an off-grid lifestyle and need precise time synchronization for their systems.
Embarking on an exploration into timekeeping, we’re set to construct a Stratum-1 NTP server, harnessing the power of the budget-friendly, yet potent, OrangePi Zero LTS. This venture appeals to remote researchers, tech-savvy homesteaders, or anyone drawn into the spellbinding world of off-grid living. Our guide is a fusion of creativity and practicality, enabling you to claim command over each vital nanosecond.
In the intricate ecosystem of technology, the Network Time Protocol (NTP) operates like a phantom conductor, harmonizing countless systems. However, latency, an unfortunate side effect of internet connections, disrupts this harmony. This is where our Stratum-1 NTP server comes into play. Skillfully crafted to sidestep latency and reduce costs, our server optimizes system operations. We’re not just dabbling with technology, but venturing towards an environment pulsating with synchronization, efficiency, and self-reliance.
Underappreciated yet crucial, time synchronization is the rhythm that orchestrates the smooth functioning of our digital devices. It guarantees data consistency, enables accurate event sequencing, fortifies network security, and promotes efficient log management.
At its core, it’s a beautiful dance directed by NTP. A device sends a time request to an NTP server, which returns the time. The device then fine-tunes its clock to match the server’s time, accounting for any network latency.
Time synchronization is a cornerstone across a multitude of technological platforms. It ensures seamless telecommunications, facilitates IoT networks, navigates GPS, and governs computer networks. By creating your Stratum-1 NTP server, you’re stepping into this enthralling universe of synchronization. Ready to embark on this journey?
Yes, you read that right, “Clockwork OrangePi.”
I drew inspiration from the dystopian world of A Clockwork Orange for my project name - not because the novel/film has anything to do with timekeeping, but because the opportunity was just too delicious to pass up. There’s a certain whimsical irony in the juxtaposition of a film about chaos and our project about precise order. Now, let’s turn that chaos into clockwork!
Setup Instructions
Here we navigate the fascinating process of transforming your OrangePi Zero LTS into a precise clockwork master, aka “Clockwork OrangePi.” Detailed instructions will guide you through the intricate twists and turns, illuminating the path to mastering time, all within a device named after a film that was quite masterful at twisting time itself.
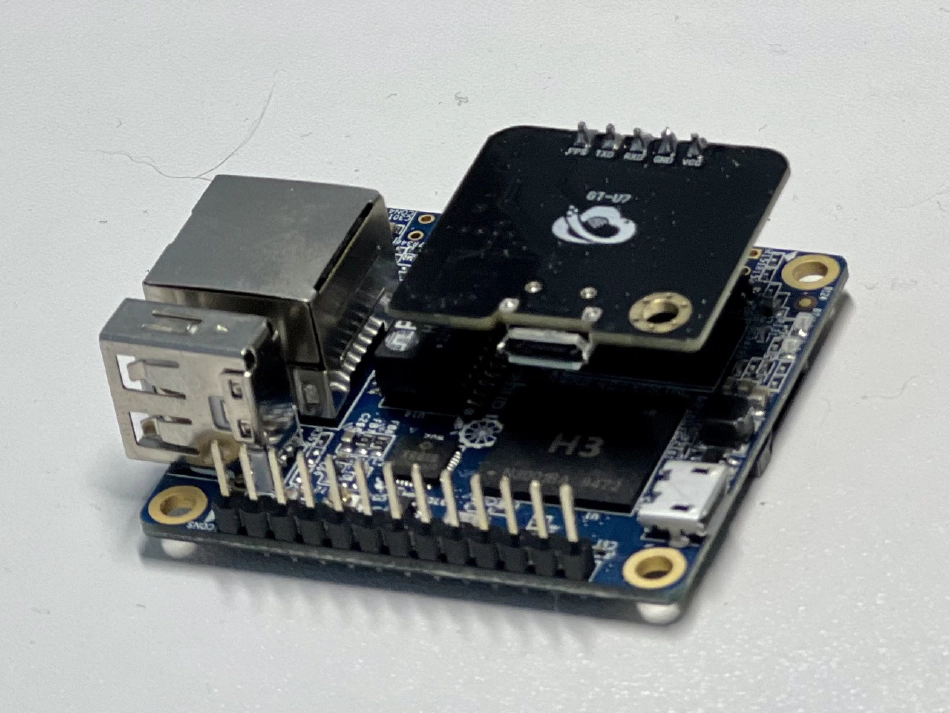
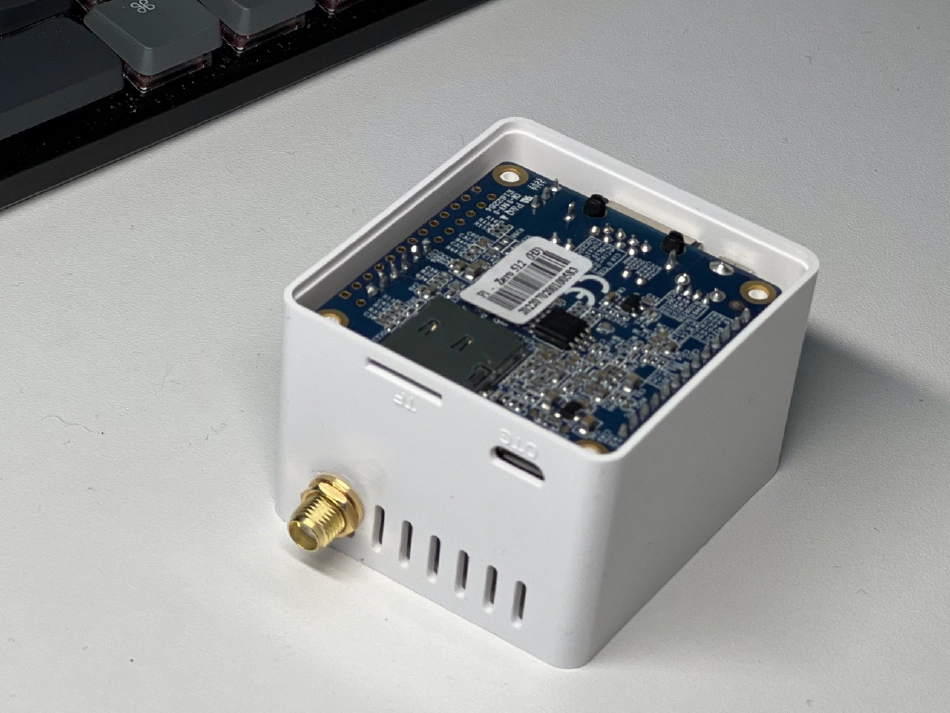
Every great adventure calls for a trusty sidekick. In the classic Kubrick film, it might have been Alex’s droogs, but on this voyage, it’s an SBC. The OrangePi Zero LTS and its cousin, the Raspberry Pi, are popular for their power efficiency and affordability. For our journey, we’ve chosen the OrangePi Zero LTS, a hidden gem packed with potential and ripe for a juicy pun.

Hardware Requirements
- OrangePi Zero LTS
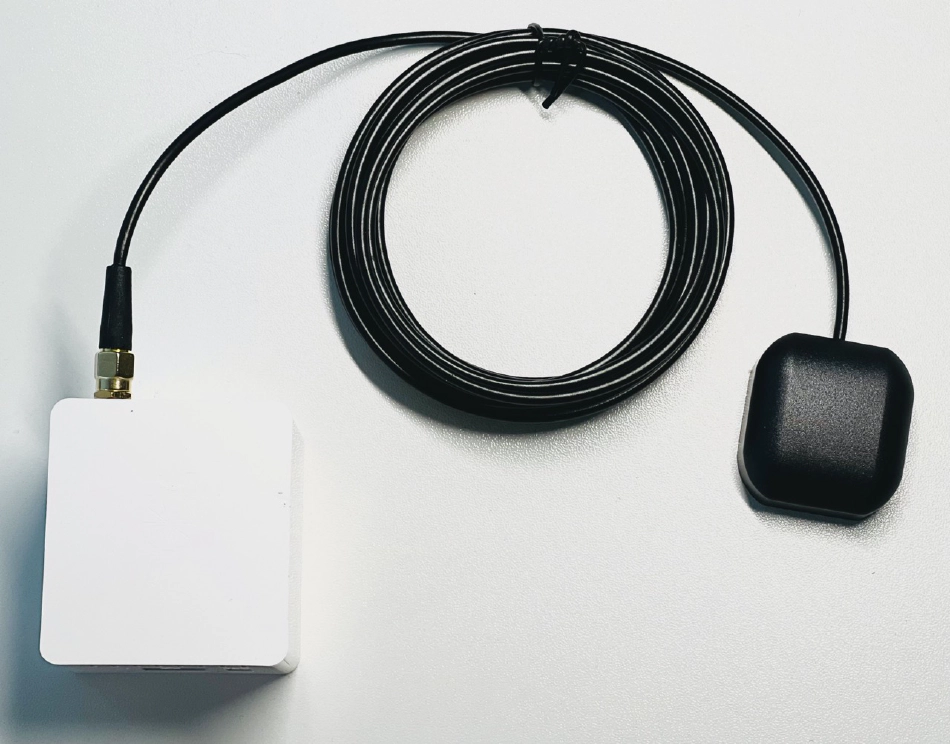
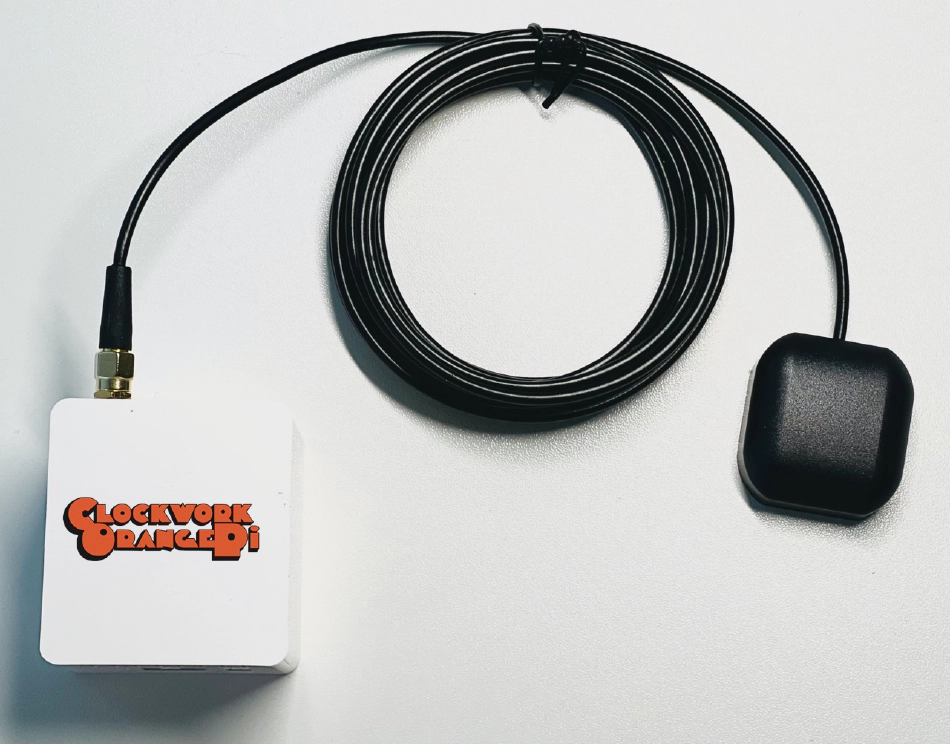
- GPS module with antenna
- MicroSD card (8GB or more)
- Micro USB power supply
Software Requirements
- Armbian Buster (latest version)
- NTPsec
- PPS-tools
- GPSd
Step 1: Prepare the OrangePi Zero LTS
Flash the latest version of Armbian Buster onto your MicroSD card using a tool like Balena Etcher. Once the flashing process is complete, insert the MicroSD card into your OrangePi Zero LTS.
Step 2: Connect the GPS Module
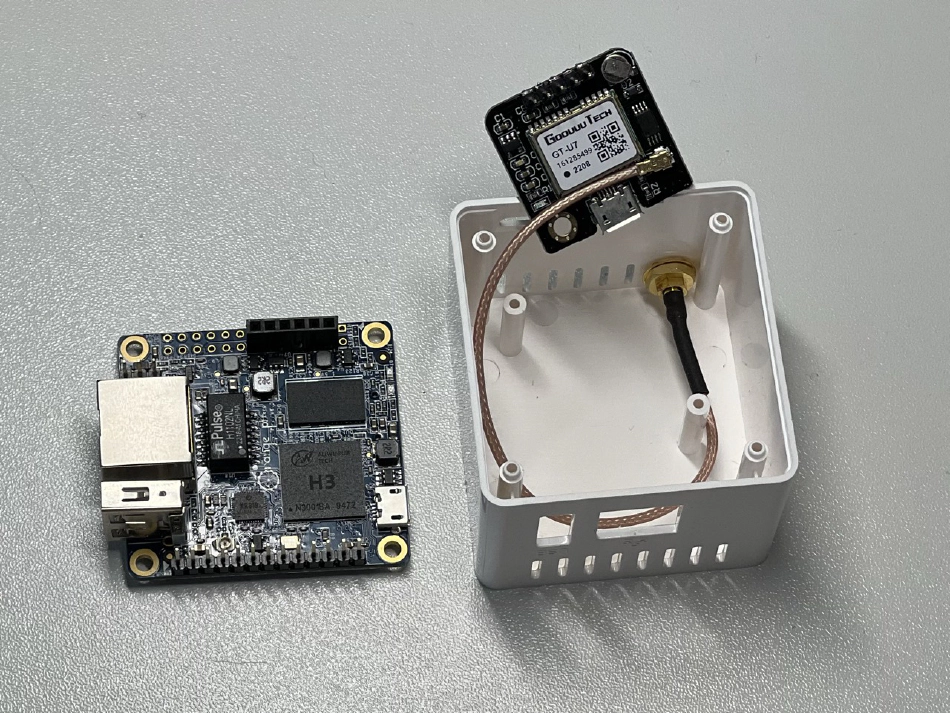
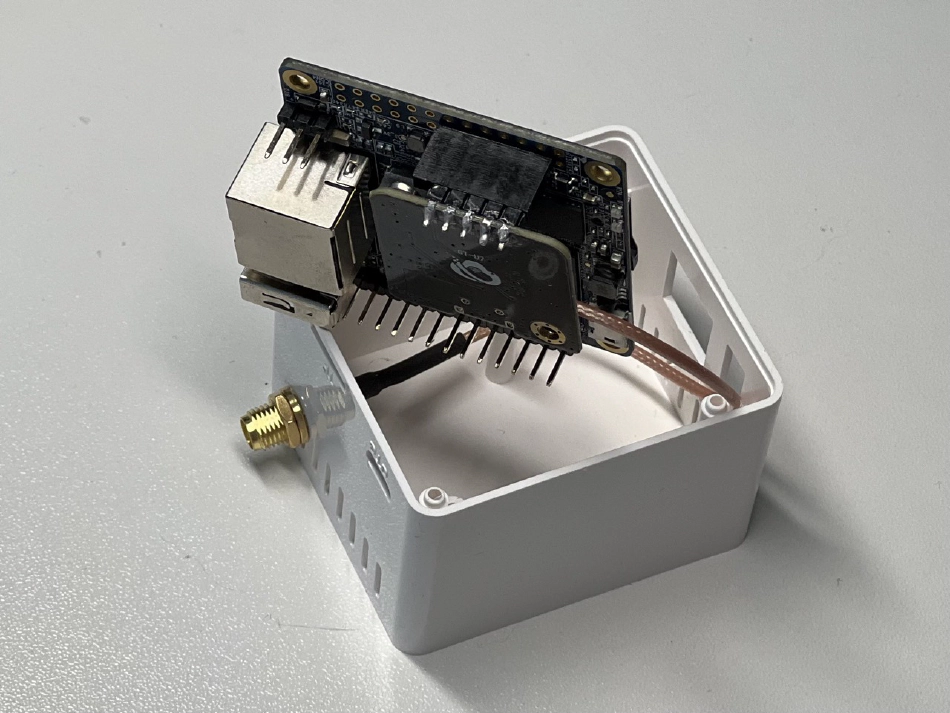
In this step, we’ll be connecting the GPS module to the OrangePi Zero LTS. For this guide, we’re using the GT-U7 GPS module, but the process should be similar for other GPS modules. No matter the GPS module, it’s essential in ensuring our Clockwork OrangePi can keep time with a precision worthy of its name.
Here’s how to connect the GT-U7 GPS module to the OrangePi Zero LTS:
-
TXD to UART1_RX (PIN10): Connect the TXD pin on the GPS module to the UART1_RX pin on the OrangePi. This allows the GPS module to transmit data to the OrangePi.
-
RXD to UART1_TX (PIN8): Connect the RXD pin on the GPS module to the UART1_TX pin on the OrangePi. This allows the OrangePi to transmit data to the GPS module.
-
PPS to PA-07 (PIN12): Connect the PPS pin on the GPS module to the PA-07 pin on the OrangePi. The PPS (Pulse Per Second) signal is used for time synchronization.
-
VCC to 3.3V or 5V (PIN1 or PIN2): Connect the VCC pin on the GPS module to either the 3.3V pin (PIN1) or the 5V pin (PIN2) on the OrangePi. The GT-U7 GPS module can accept either voltage for power.
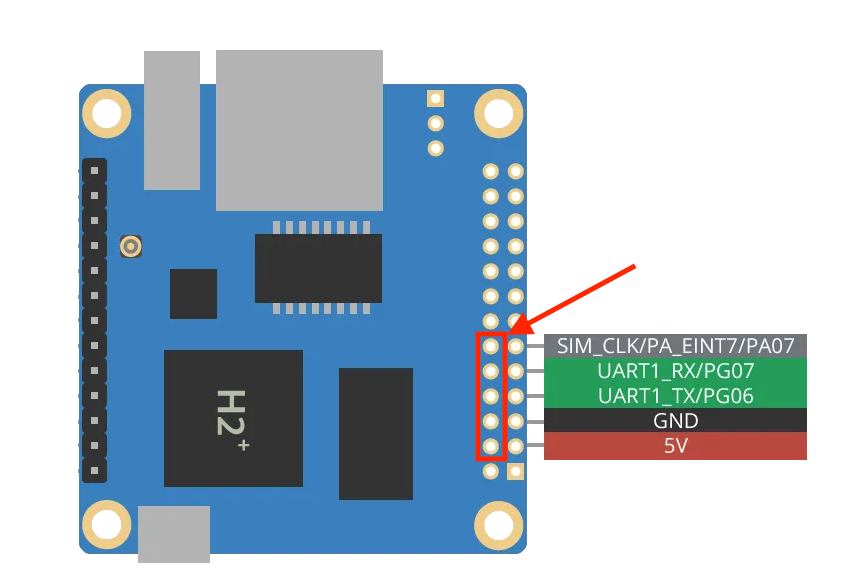
You can use plugs and pins to make these connections, or you can solder the connections directly. If you’re new to soldering, make sure to take all necessary safety precautions.
Once you’ve made these connections, your GPS module should be ready to communicate with the OrangePi Zero LTS, providing it with precise time signals for your NTP server.
Step 3: Install the Necessary Software
Log into your OrangePi Zero LTS and install the necessary software packages:
sudo apt-get update
sudo apt-get install ntpsec pps-tools gpsd
Step 4: Configure GPSd
Edit the GPSd configuration file:
sudo nano /etc/default/gpsd
Update the file with the following settings:
START_DAEMON="true"
GPSD_OPTIONS="-n"
DEVICES="/dev/ttyS1 /dev/pps0"
USBAUTO="false"
GPSD_SOCKET="/var/run/gpsd.sock"
Save and close the file, then restart GPSd:
sudo systemctl restart gpsd
Step 5: Configure NTPsec
Edit the NTPsec configuration file:
sudo nano /etc/ntpsec/ntp.conf
Update the file with the following settings:
# GPS Serial data reference
server 127.127.28.2 minpoll 4 maxpoll 4 prefer
fudge 127.127.28.2 time1 0.0 refid GPS

# PPS reference
server 127.127.22.2 minpoll 4 maxpoll 4 prefer
fudge 127.127.22.2 refid PPS

# Drift file
driftfile /var/lib/ntpsec/ntp.drift

# Logging
statsdir /var/log/ntpsec/
statistics loopstats peerstats clockstats
filegen loopstats file loopstats type day enable
filegen peerstats file peerstats type day enable
filegen clockstats file clockstats type day enable
The drift file is automatically created and managed by the NTP software. It’s used to store the estimated clock frequency error of your system. Over time, the NTP software learns how fast or slow the system clock runs compared to the NTP server’s clock, and it stores this information in the drift file. This allows the NTP software to compensate for consistent drift, keeping the system clock more accurate.
Save and close the file, then restart NTPsec:
sudo systemctl restart ntpsec
Step 6: Verify the NTP Server
You can verify the operation of your NTP server using the following commands:
watch ntpq -p
watch cat /sys/class/pps/pps0/assert
The first command will show you the status of your NTP peers, while the second command will show you the PPS assert timestamps.
Troubleshooting
Even with the best of preparations, you may encounter some hurdles along the way. Here are some common issues and their solutions:
Issue: NTP Server Not Synchronizing
If your NTP server isn’t synchronizing, it could be due to several reasons:
- Access Control Lists (ACLs): Ensure that UDP port 123 is open throughout your network for NTP packets.
- Misconfiguration: Double-check your configuration settings. A small error can prevent synchronization.
- Public Time Server Down: If you’re syncing with a public time server, it might be temporarily unavailable. Try syncing with a different server.
- High Network Traffic: High traffic on your router or on the way to the server can cause synchronization issues. If possible, try to reduce network load.
Issue: Stratum Too High
NTP uses the concept of a stratum to describe how many NTP hops away a machine is from an authoritative time source. If the stratum reported by the NTP server is too high, your server will reject it and display a “stratum too high” message.
This can happen if you’re using a Linux host as an NTP server and have hardcoded the stratum that it reports, rather than letting it calculate the stratum automatically. To fix this, you can adjust the stratum settings in the /etc/ntp.conf file.
Issue: NTP Master Not Synchronizing
An NTP master considers itself synchronized when it receives authoritative NTP time from another source, the clock is manually set, or the calendar chip is read via clock/calendar read (only if clock calendar valid is configured). If your NTP master isn’t synchronizing, check these factors.
Issue: Can’t Adjust NTP Poll Interval
The NTP protocol specifies how often the polling interval is required based on how various phase-locked loops are performing. The minimum poll period specified in the RFC is 64 seconds (ntpminpoll), and the maximum is 1024 seconds (ntpmaxpoll). You cannot adjust this on a router.
Remember, the key to troubleshooting is patience and systematic testing. If you’re still encountering issues, don’t hesitate to seek help from online communities or tech support.
Enhancing Precision: CPU-Based Temperature Control
A few months back, I also stumbled upon an intriguing concept on David Taylor’s website. It was a shell script designed to control the temperature of a Single Board Computer (SBC) using the heat generated by the CPU. This approach is particularly useful if your clock oscillator is integrated into the CPU, as it provides a way to control its temperature and theoretically achieve more accurate timekeeping.
I decided to give it a shot and was pleasantly surprised by the results. With a few tweaks, I managed to get it working exceptionally well and even scripted it as a service. The maximum offset I observed was less than +-20 microseconds. You can find the original script and more information find the original script and more information here .
The script, named ntpheat, is written in Python and aims to stabilize the CPU temperature at 54C by default. If one instance of ntpheat can’t generate enough heat to reach the desired temperature, you can run multiple instances using the -c option. For example, to run three copies of ntpheat, you would use the command ntpheat -c 3.
However, to make the CPU-based temperature control work effectively, there must be no CPU-intensive processes running. This means disabling any cron jobs that load the CPU or forcing them to use less CPU over a longer period. To achieve this, you can use cgroup-tools to limit CPU usage for certain jobs. For example, you can limit CPU-intensive jobs to use only 10% of the CPU, or even less for particularly demanding tasks.
Here’s an example of how to set up a systemd service for ntpheat:
[Unit]
Description=ntpheat

[Service]
ExecStart=/usr/bin/ntpheat.sh
Restart=on-failure

[Install]
WantedBy=multi-user.target
If you’re not familiar with setting up a systemd service, you can find more information here .
By implementing this CPU-based temperature control, I’ve managed to further enhance the precision of my Stratum-1 NTP server. It’s a testament to the power of innovation and the endless possibilities that technology offers us. With every tick and tock, we’re not just keeping time; we’re refining it, perfecting it, and making it our own.
Reaping the Rewards
When the journey concludes, we emerge as more than travelers. We’re creators, pioneers in a realm where time and technology intersect. This DIY NTP server, the fruit of our labor, offers a bounty of benefits that extend far beyond the confines of its physical form.
Firstly, it minimizes latency. By hosting the NTP server locally, we eliminate the delays associated with accessing a remote server over the internet. This ensures that our systems receive the most accurate time data as quickly as possible, enhancing their performance and reliability.
Secondly, it cuts costs. Commercial NTP appliances, while effective, can be prohibitively expensive. By building our own server, we significantly reduce our expenses, making precise time synchronization accessible even on a tight budget.
Thirdly, it ensures timekeeping precision down to a mesmerizing 100ns. This level of accuracy is crucial for many applications, from scientific research and financial transactions to system diagnostics and network management. With our DIY NTP server, we can enjoy this precision without the hefty price tag of commercial solutions.
But the rewards of this project go beyond the practical. Building our own Stratum-1 NTP server is a testament to self-reliance and technical ingenuity. It’s a demonstration of our ability to harness the power of technology to meet our needs, to adapt and innovate in the face of challenges. It’s a beacon of self-reliance, a symbol of our capacity to navigate the complexities of the digital world and emerge victorious.
This DIY NTP server is more than a project; it’s a journey of discovery and creation. It’s a treasure found not in the depths of the sea but in the mastery of time. It’s a testament to the power of human ingenuity and a reminder that with the right tools and knowledge, we can shape the world around us to our liking. So, as we reap the rewards of our labor, let’s take a moment to celebrate not just the end product, but the journey that led us here.
Conclusion
In mastering a Stratum-1 NTP server, we don’t just follow the flow of time; we become its conductors. We take the reins of an invisible force that governs our digital world, directing it with precision and purpose. This voyage is more than a technical endeavor; it’s a celebration of human ingenuity and the changing power of technology.
This journey is a step towards self-reliance, a move towards independence in a world increasingly reliant on interconnected systems. By building our own NTP server, we’re not just creating a tool; we’re crafting a statement of autonomy. We’re demonstrating that with the right knowledge and resources, we can take control of the technologies that underpin our lives, shaping them to better serve our needs.
But beyond self-reliance, this journey is a testament to the freedom that comes from mastering time. Time, in its relentless march forward, is often perceived as an unyielding force. But in the realm of technology, we’ve found a way to harness it, to bend it to our will. With our Stratum-1 NTP server, we take the abstract concept of time and give it tangible form, transforming it into a resource that we can control and optimize.
So, fellow adventurers, let’s set sail on this captivating journey. Let’s embark on this exploration of time and technology, armed with curiosity and driven by the desire to learn, create, and innovate. With every tick and tock, let’s harness the power of precision, one nanosecond at a time. And as we navigate this voyage, let’s remember that the true reward lies not just in the destination, but in the journey itself - in the challenges we overcome, the knowledge we gain, and the skills we develop. In the end, we’ll emerge not just as travelers or creators, but as masters of time, ready to face the future with confidence and precision.
Last Updated: June 6, 2024
Robert
Dillon Baird - dillonbaird.io
Elbert Mccurry - penzu.com
Allen Capps - www.instagram.com
Jeremy Stickler - e2pkr.co
Stacia Leibius - banana.iwinv.net